Jul 31, 2009

Christmas Dustin Style

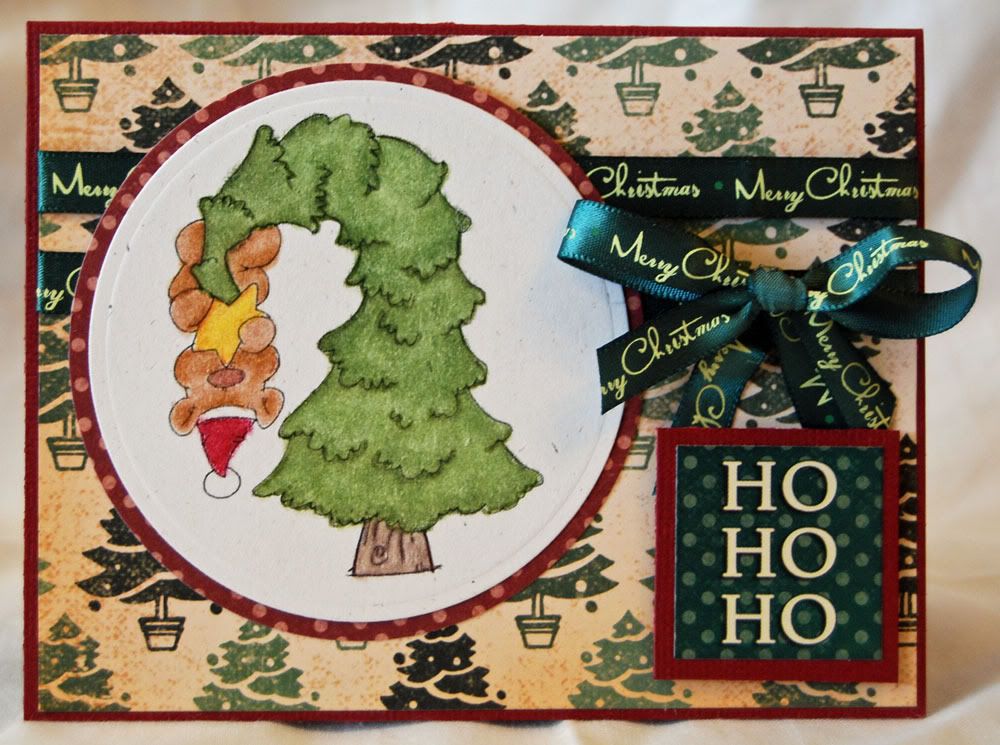
treed bear cardI'm one of those Christmas nut cases that decorate their house following a specific theme. I love the sparkling whites and blues and the oodles of snow themed decorations. None of today's projects fall within that theme. :) So, let's start with a card. As soon as I saw this image in this week's collection from Dustin, I knew I would use it. It fit well with my sense of humor and I can easily see sending it out to a friend during the holiday season. Since I had my BoBunny paper bin out, I pulled out their Classic Christmas papers from a couple of years ago. Decorating with a theme doesn't necessarily mean I don't horde Christmas papers in traditional colors.

In addition to being psychotic about my decorations, I also wrap packages with real ribbon bows, tying on gift tags rather than using the prepackaged flimsy tags that are sold in stores. I love making personal gift tags for each package. I think that makes the gifts just that much more special, not to mention looking really cool when they're stacked under the tree. They're also great to tie onto gift bags as an added embellishment.
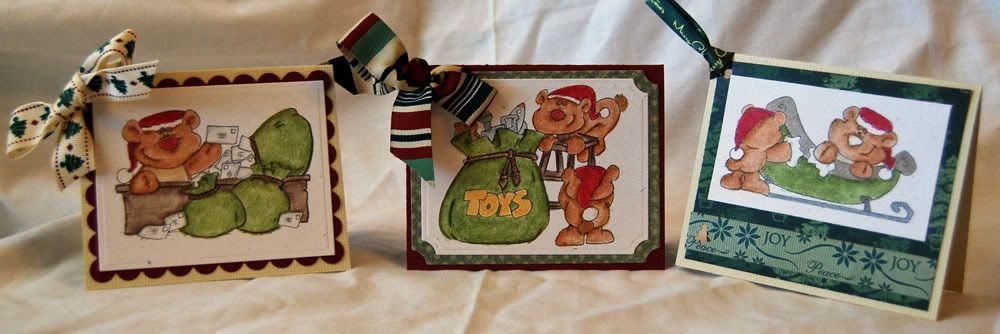
trio of gift tags

These tags are 3" x 3 1/2" with a hole punched in one corner for the ribbon. For package use, I would use the bit of ribbon to tie the tag to the package or bag. The images were printed at actual size for these tags. I've also done smaller tags that are 2 1/4 x 2 1/8. Those are done by taking a quarter sheet of standard 8 1/2 x 11 cardstock and cutting it in half, then folding that in half again. Quick easy cutting measurements. For those, you'll want to size the images down, perhaps using the more simplified ornament peekers that Dustin has released this month.

Project SuppliesSupplies this time around are pretty cut and dry. I used BoBunny Classic Christmas papers. These are a couple of seasons old, but I wouldn't be surprised if you couldn't find them with a bit of searching on the internet. The ribbon is also from the Classic Christimas collection. I also used Bazzill cardstock and a few different Spellbinders Nestibilities. Check out Dustin's new release for this week and don't forget to stock up on the Christmas images he's released the rest of the month.
Jul 27, 2009

I hope you dance

How do I go from a directory of digital photos to a finished layout? My process is pretty simple. I frequently start by deciding what paper I want to use. I know this is the reverse from most people. Paper inspires me, though. Once I have paper picked out, I go hunting for a sketch that I think will go well with the patterns on the paper. My sketches come from either something I've found online, or one I've drawn myself. I get inspiration for my sketches from magazines and layouts I've seen in galleries or blogs online. My sketches tend to be more basic than the ones you might find at Page Maps or one of the other sketch places online. They're more of a reminder of the initial inspiration than a true map.

Once I have my paper and sketch, I decide what photos from my files will work best. Usually, I have several options to choose from. I pick my favorites that seem to suit the paper the best and print those. I usually print my favorite photo as a 5x7 to serve as the focal point of my layout. The others get printed as 4x6 or wallet size. Don't be afraid to choose several sizes!

At this point, it's usually a matter of just putting everything together. Every once in a while, however, it just doesn't work. When that happens, I struggle. I spend ages trying to "fix" the problem. That's what happened when I started working with these photos. The paper, Bobunny Alissa, I felt was perfect for the photos. My problem was in the sketch. I had done something I never do. I had tied myself to a sketch, so much so that I even spent time in the Cricut Design Studio recreating the side element. I use sketches as a jumping off point, more inspiration than map. The linear design of the sketch became limiting and stifled the flow of the pictures. I couldn't find the unbridled delight of my daughter dancing in the design, so I stopped. I put the layout aside and worked on a different group of photos.

When I went back to the layout, I saw how stifling the design was and set to work trying to salvage what I could of the paper and photos. In the long run, it was mostly a lost cause. My photos ended up stuck to one another and the paper had been cut in long lines, which doesn't salvage well. The only thing I managed to save was the base cardstock, which was a nice chocolate brown and the pink letters I had cut for the title. I tucked the brown cardstock away for another project. The only thing that remains from the original layout is the pink letters.

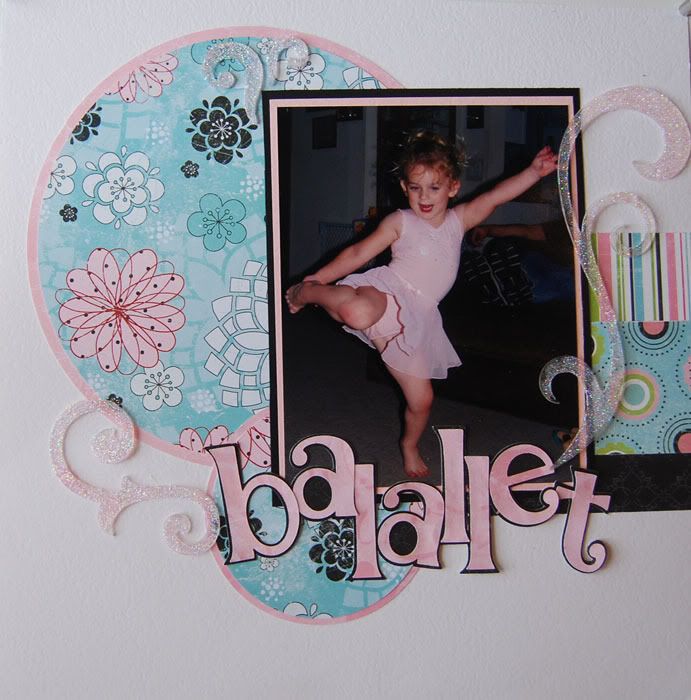
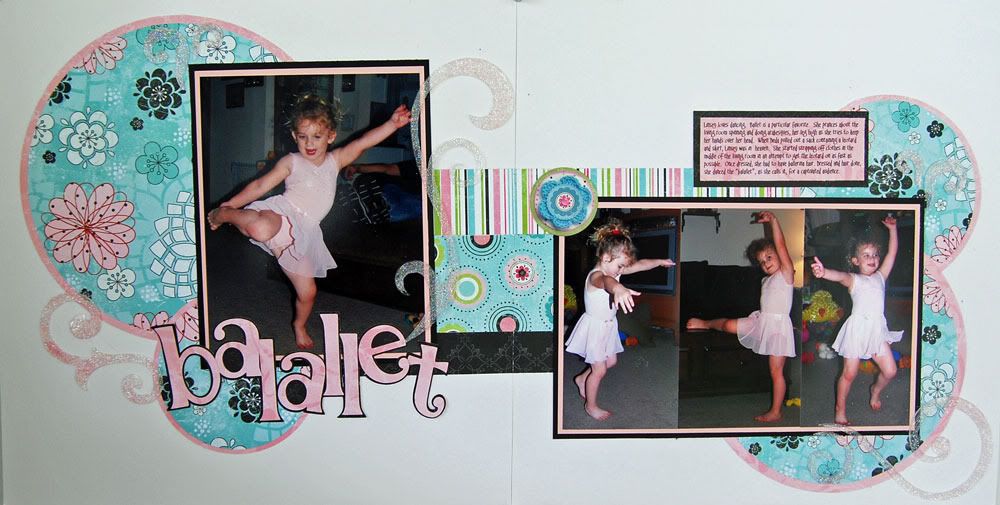
Balallet

I think you'll agree that this layout works very well with the photos. I like the airy feel of white space in the layout paired with the illusion of movement the circles give. I managed all four circled and mats with a single sheet each of the papers. The pink mats are just rings on the back sides of the solid blue circles. This let me do the mats, the lettering and the journaling block with a strip of paper left over.

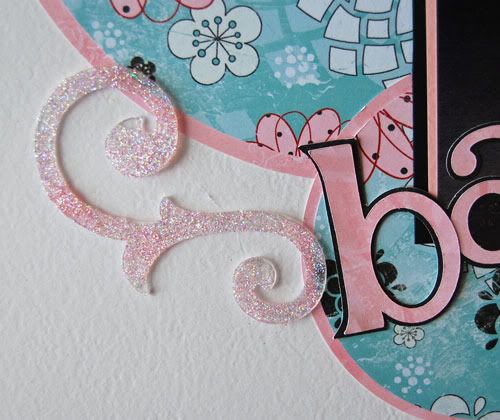
PhotobucketWhen it came to embellishing, I wanted something that would add to the light feel of the layout without overwhelming it. I bought a pack of acrylic Bobunny swirls a few months ago as an impulse buy. I wasn't sure what I would do with them. I thought they would be perfect and was fairly happy with the effect when I placed them on the layout. I thought they still needed something however as they seemed to fade into the background. Pink glitter did the trick. I used Making Memories Glitter Glaze to coat one side of the acrylic swirl and dumped on a thin coat of Art Institute Pink Glitter. The glitter gave me the pop I needed while keeping the swirls from being too heavy for the overall feel of the layout.

For those of you who prefer single page layouts, here's a close up of the left side. You'll notice that even though the horizontal bars in the double page layout tie the to pages together, they can be a simple stand alone element in a single page layout.

balallet left

This little moment happened when my parents came to visit back in April. They brought with them a leotard and skirt. My daughter was in heaven. She loves to dance, and ballet is a favorite. She would pull on her the skirt from her Halloween fairy costume and do "balallet". I thought that using my daughter's word for Ballet was the perfect finishing touch.

Project SuppliesSupplies for this layout are primarily BoBunny. I really love their papers. Such diversity and charm! This is from the Alissa line. I used my EK Success circle cutting system for the jumbo circles, BoBunny acrylic swirls and Art Institute Glitter. The title is the Alphalicious font for the Cricut with the fun chaotic styling on the shadow done in the Design Studio. More BoBunny coming up in future posts. I found a layout from when I first got my cricut while I was doing some cleaning. It's a fun, no kid layout, so stay tuned.

Jul 18, 2009

Packing my bag...

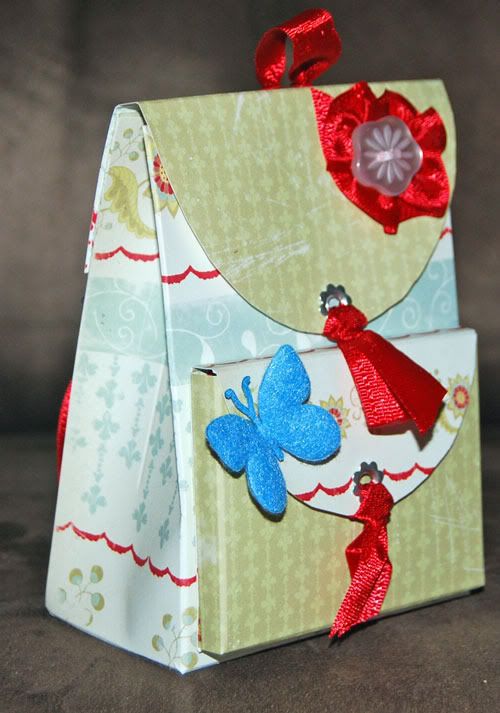
Dutch Girl Backpack front sideWith chocolate and good wishes. I don't know if you have noticed or not, but it's been over 2 weeks since my last blog post. It's been a roller coaster of a month so far, but things are getting better. You see, on July 1st at 1:30pm, I was knocked off my feet. I was informed that my company was moving to a new eCommerce model and my position and skills were no longer needed. I think that's a ongoing thing in this world today. It's difficult and frustrating and there's not a dang thing you can do about it. I floundered for a bit, as would anyone in my position. I lost my center, my balance.

It's taken me a while to find it again and find me. Sometimes I'm harder to find than my center, but in this case it was the other way around. I've got an awesome husband who reassured me that this too will pass and a firm faith in the Big Guy that through him I can do all things. So I've put myself on the market, sent out resumes and cover letters and, frankly, I'm seriously looking forward to being just a Mama for a while. We have a game plan that is already in place and kicking. As of Friday, well...I have a bit more time on my hands. Although, wrangling kids is as much of a full time job as the wrangling cats (programmers & designers). Oddly, dealing with programmers has been excellent training for dealing with 3 year olds. :)

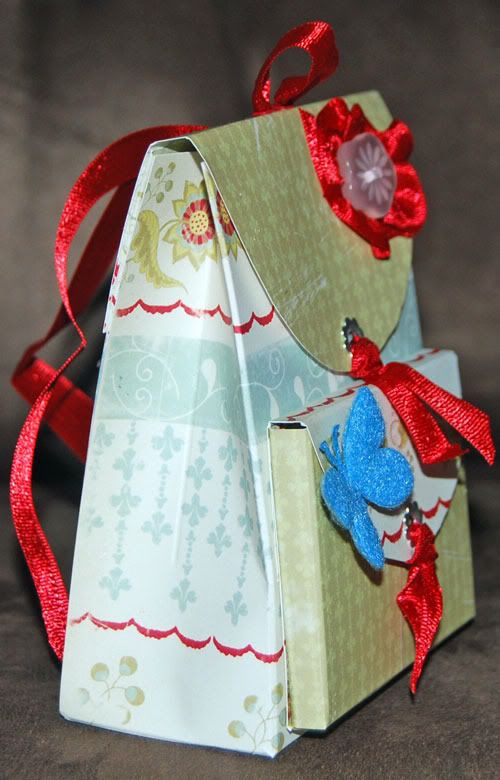
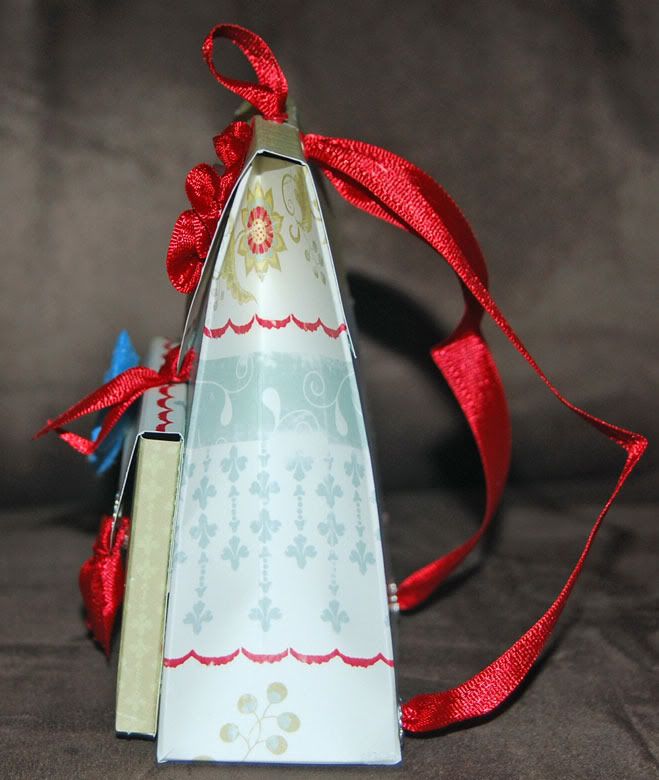
Dutch Girl Backpack side 2So I've packed my bag with chocolate and good wishes. It's a pretty cute little bag, don't you think? I used a template from Splitcoast Stampers and Cosmo Cricket Dutch Girl. It's my first go at this particular template, but I quite like how it turned out. Next time I will tweak it a bit to suit me more. I think that the flaps are a bit overwhelming and can be scaled back. Folding and cutting was pretty straight forward. I found that it worked best for me to print out the template and attach it to my patterned paper with the Herma dot repositionable adhesive. Once stuck together, I could trim it out and score all the lines without any guess work.

After everything was trimmed and scored, I removed the paper, scrubbed off the dots and started assembly. My beloved Crop-A-Dile came into play to punch all the holes, however, I wasn't able to use it for the eyelets on the top flap. It just couldn't get into that spot for crimping. I ended up digging out my old Making Memories took kit for my manual eyelet setter.

Dutch Girl Backpack sideI have a small collection of Wrights hem binding tape. I like the bold vivid colors, but the Wrights brand tends to be a bit stiffer out of the package than I care for. When I got to restock, I'm going to be hitting etsy as I've found several places there that sell bulk tapes that are silkier and softer. Still, Wrights is handy and you can pick it up in the fabric notion section of Jo Ann's, Wal-Mart (if they have a fabric section) and Hancocks. So lots of local sources. On a positive note, the stiffness really worked well when I gathered it and tucked it behind the flower button.

Project SuppliesI've pretty well covered all the supplies in the post, but here's a recap. The paper is Cosmo Cricket Dutch Girl, the last in my Cosmo Cricket run for a while. The ribbon is Wright's Hem Binding Tape, but eyelets are Making Memories while the button is (gasp) Creative Cafe. Seriously, if you have a Creative Cafe store near you, go play with their buttons. The butterfly is also Creative Cafe, from their new release. I've been waiting forever for these cute felt flutters!

Jul 1, 2009

Take Note!

One of the things I have discovered as I get older is that I have a growing dependence on lists. If I don't write it down, I don't remember it. It's like the act of writing something down logs it into my memory. I don't go shopping without a list. It is a complete disaster. If an item is not on the list, it doesn't get bought. That being said, as a paper crafter, I have an obligation, to myself at least, to not go out into the world with a shabby note pad. Since I rarely create things for myself, when I do, I tend to go a bit overboard.

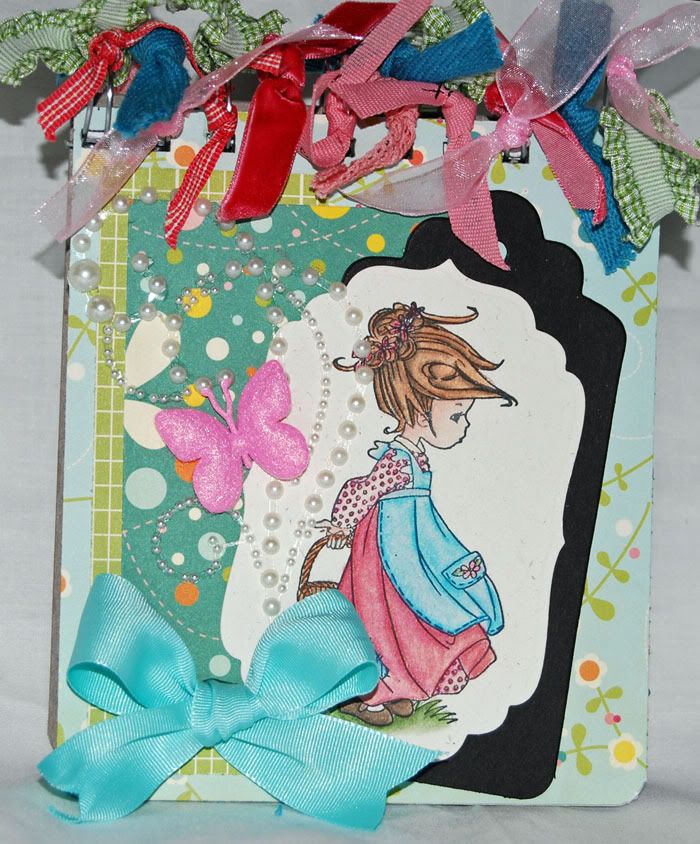
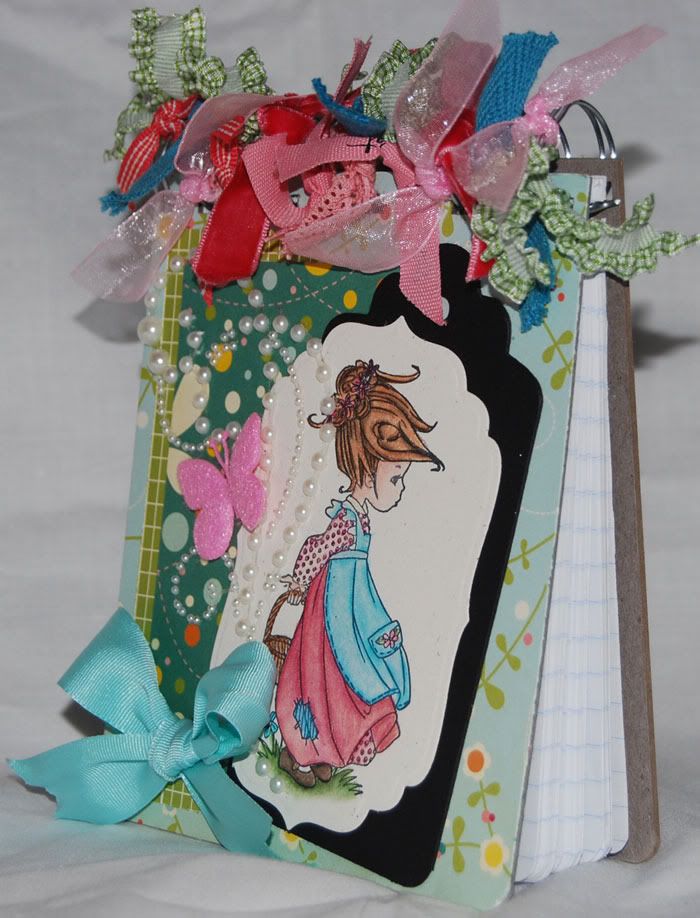
notebook front viewIn the past, I would just buy a notebook of the size I needed dress it up. This time, I decided to go out on a limb and make one from scratch. I have a Bind-It All that I got for Christmas that I hadn't used yet, so I figured it was high time to put it to use. I picked up a junior legal pad and proceeded to take my heavy duty Tonic Studios craft knife and cut it down to 4 1/2 x 5. This takes a bit of muscle and a lot of patience to keep the edges straight. Once I get the pages and back cover cut down, I run it all through the Bind-it All. I have decided that this handy dandy piece of hardware is one of my new best friends.

I divided my pages up into sections and fed them through the Bind-It All. I used a single sheet, folded in half as my initial centering point and set the guide on the side so that all my holes would line up. After I did the pages, I did the back cover. I used the thick chipboard back off the notepad. I figured it would hold up well to the wear and tear the notepad was going to get from being chunked into my purse. After the base and the pages were punched, I decided the bottom corners needed to be rounded for a more finished look. I pulled out my other new very best friend, the Crop-A-Dile Corner Chomper. This little beauty rounded the corners of the super thick base chipboard without even flinching.

notebook side viewBecause I wanted durability for the cover as well as the base, I knew just covering chipboard would not give me the results I wanted. After some thought, I pulled out a sheet of grungeboard. Now there are lots of wonderful things you can do with Grungeboard, but I didn't do any of them. Instead, I used it as a base for my cover. I wallpapered over it with Cosmo Cricket's Girl Friday papers. I used a dry glue to preserve the flexibility the grungeboard was bringing to the cover. I like Kokuyo Dot'n'Roller permanent. It stands up to all sorts of abuse. I regularly use it on altered projects and have never had anything glued together with it, come apart. Just make sure you get adhesive out on the very edge of your paper.

While I liked the look of just the Cosmo Cricket papers on the front, I wanted it to be a bit more...girly. I added one of my favorite stamp images from Sugar Nellie, Windswept by Elisabeth Bell. She's done on PTI Rustic Vanilla. I love how vibrant she came out. She was sitting in a pile of images I had colored a couple of weeks ago and just happened to match the colors in Girl Friday. I trimmed her out with Labels 3 Nestie and mounted her on a black tag I had in my stash.

It still wasn't quite girly enough for me. I dug out my stash of Prima Say it with Crystals (and pearls!) swirls. They didn't fit like I wanted, so I took a pair of scissors to the pearls. I trimmed off the bottom of the swirl and relocated some of the strings of small pearls until everything fit like I wanted. I finished off the front with a new Creative Cafe felt butterfly and a bow I found when I was digging for the pearls. I love unexpected finds and my craft area is loaded with them!

I punched the cover and after some muttering at the micro size of the photos in my Bind-it All instruction manual, managed to get it all bound. The rings are "quite" round, but round enough that the cover moves freely. A bit of ribbon tied along the top adds a bit more girly fluff and pulls it all together.

Project SuppliesI've pretty much covered the supplies list through the post, but here's a quick recap. The paper is Girl Friday from Cosmo Cricket, the stamp is from Sugar Nellie, the cover is Tim Holtz Grungeboard. Tools used are the Bind-it All, We R Memory Keepers Corner Chomper, Spellbinders Nestibilities and Tonic Studios craft knife. Ribbon and tag are from my stash, while the pearl swirl is Prima. No buttons this time, but the butterfly is Creative Cafe.