Aug 26, 2008

CKC Tulsa - I shopped 'til I dropped

My anniversary is next weekend, but my oh so thoughtful husband gave me an early anniversary gift...a trip to a CKC convention. Yay me! It's great that he knows me so well. This is only my second trip to this convention in the four years it's been in Tulsa. Typically, we're already on vacation somewhere else, so I'm not able to go. This is also a teeny (seriously teeny) convention, so it doesn't rank high on my "drop everything and go" list. Still, I'm not about to skip a day to myself scrappy shopping! I hadn't planned to attend, so I didn't register this summer when it was available. That left me scrambling through the class list trying to decide if I wanted to take a class or not. I know it's only been a year since I took classes at a scrapbook convention, so I was floored at how much some of the classes were charging. There were several that were over $30! Seriously!! In the end, I decided that one class first thing in the morning and spending the rest of my money on supplies was the best division. That got me at the convention center in time for reasonable parking, plus if I found the right class, I might actually learn something.

My first class choice was an acrylic book. After my tag experience, I've been wanting to try a mini album in acrylic. After trying to get to the sponsor's web site and failing miserably and doing some searching, I found several reviews on the class. None of them were flattering. They all agreed that the album was top notch for quality, but that the class seriously lacked. After checking out their booth and class sample, I'm inclined to agree. I figured it would be a reasonable backup alternative if my new first choice was full. My next option was a SEI class. To be honest, being SEI, I really figured the class would be booked. I think the only reason it wasn't was the time slot. The class was actually very lightly populated, which made for a very relaxed atmosphere. I can honestly say it was one of the best classes I've taken at a scrapbook convention. The class was on SEI's velvet paper. I'd dabbled a bit with velvet paper back in the day when I started stamping, so I knew what to expect for the paper. The techniques, however, totally rocked and on a couple of occasions, surprised me.

Photobucket

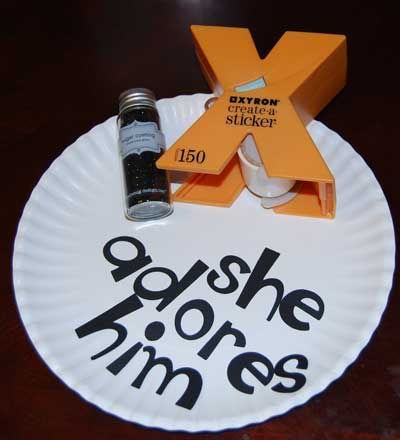
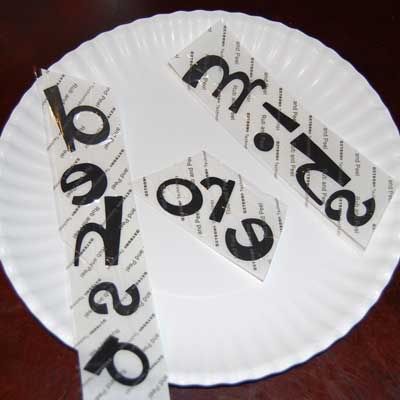
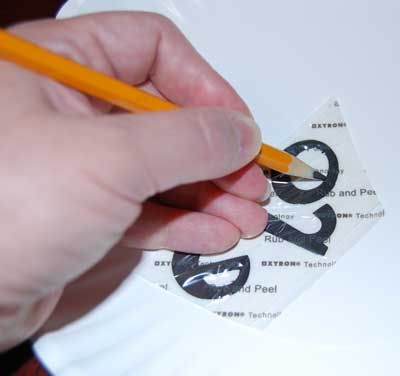
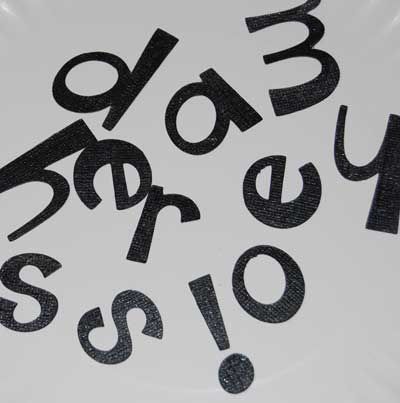
The project was a cute accordion mini book. It's not done and to be honest, the colors are not something I would have chosen, but I do really like how it's coming out. And frankly, velvet paper just rocks. I immediately jotted off a mail to my LSS owner asking if she had seen it and considered carrying it. I do hope so! Velvet paper has all the lush qualities of real velvet in a paper form. Which also means that anything you can do with paper, you can pretty much do with this stuff. We inked it, stamped it, and embossed it. Our oh so fabulous instructor also tells me you can run it through an ink jet printer and print on it. I bought 3 12x12 sheets in colors that match my LSS kit for the month. :) They also carry it in assortment packs but I didn't see any of those in their booth. As an added bonus for the class I won a package of buttons, plus they gave us a page of alpha stickers and a 40% coupon.

The totally cute instructor is Connie Hastings, who really did a bang up job teaching the class. Check out her blog!

Photobucket
Photobucket
Photobucket

After class, I had 20 minutes to check out the displays for other classes, pick up my vendor floor pass and take a quick break. A scrappy convention is one of the few places where a girl has the opportunity to use the men's bathroom. I should have taken a picture. How funny would that be?

Once the important necessities were addressed, it was time to shop. Number one on my list of things to pick up was adhesive. I can't believe that I'm clean out of glue for the second time this summer! I've heard good things about Zip Dry for acrylics and it's made by the same company as the glue I used for my acrylic tags, so I grabbed a bottle of that. My girl latched onto the lid when I got home and I haven't a clue where it's ended up. She's like a magpie for crafty objects. I've also heard good things about Kokuya adhesives, so I grabbed one of those and a couple of refills. I have an on again off again relationship with my Herma tab dispenser, so I decided to pick up a We R Memory Keepers one and see if I liked it better. It came in a very alterable clear. I can't wait to doll it up with some rubons. I also picked up a couple of sticks of QuickStik. I've heard very positive reviews of it when adhering paper to chipboard.

Photobucket

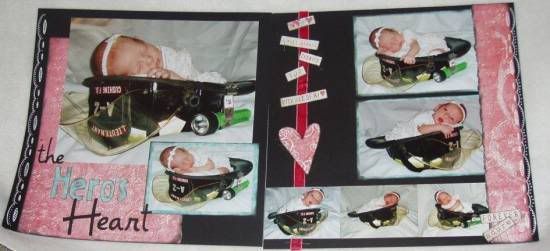
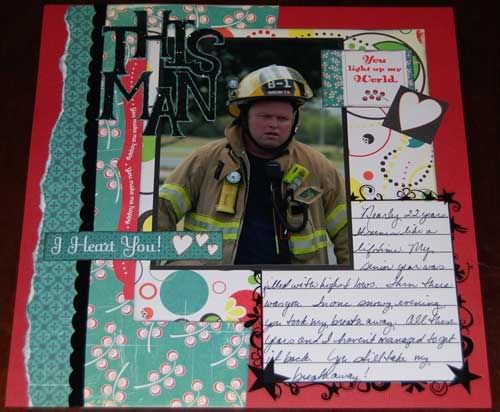
That brings me to my next set of purchases. I opted for three chipboard mini albums in cute shapes. Two Maya Road and an oh so cute fire hydrant one from Boxer to do fire station pictures.

Photobucket

I took a break from my shopping to sit down to make & take a cute alerted clipboard. They had one of those big glue and go guns from GlueArts that look like the ATG guns. I got to give it a try and I must say that I am NOT impressed. I found it bulky, heavy and difficult to use. Thankfully, I can say that without having dropped the $$ to buy one! On the up side, I was a total rebel and didn't follow the directions on the make & take. The demo gal was busy chatting it up with another lady, so I took the bits and glued them down how I thought they should go. I love how it turned out.

Photobucket

I watched a few other make & takes along the way and got some good ideas for quick projects and simple gifts. Then I broke for lunch. I have friends in the area who I used to work with. Phil, who I must say is one of my very best friends (and possibly the younger brother I always wanted, even though I already have one) cruised over to pick me up and drive me down town. Between construction and traffic, I'd never have made it without him. I was totally glad I did. Even though one friend totally flaked and the other was hijacked into a team lunch for work, the remaining crew was fabulous company. I totally miss working with these guys! Even though I had my camera and mentioned early on that we could do a photo, none of us remembered after the eating was done. So you'll just have to imagine four geeks at a table talking computers, work and super heroes. I did say we were geeks. No one understands a geek like another geek. It was a right fabulous lunch.

After lunch, it was back across town for a bit more shopping. I raided my favorite paper lines, adding extra SEI poppy to round out my LSS club kit, the oh so cute Imaginisce Hallowhimsy and some of the oh so yummy Scenic Route Sonoma. I have a pile of paper on my dining room table and I just don't know what to cut into first!

Photobucket

One of my weaknesses is brads and eyelets. I shamelessly indulged myself when I hit the Dollar Scrapbooking booth and then again at the We R Memory Keepers booth.

Photobucket

So even though it was a teeny convention and none of my favorite vendors were there for me to drool over, I still had a grand time and feel that my money was well spent. Particularly after I spread it out on the table and examined my haul. Not bad for a mere $150, minus class & vendor floor fees.

Photobucket

Aug 21, 2008

Check it out!

My very first toot! I'm a designer for my oh so fabulous LSS! Check it out! Too cool, huh? Even cooler, Andrea, one of the other designers, is also a fire wife. Her husband was once my husband's lieutenant.

Needless to say, I'm super excited! I can't wait to share my stuff!

Aug 19, 2008

The Last of the the July Kit

If the number of layouts and projects I manage out of a single kit is any indication of how much I love a kit, then I clearly adored the July Inspire Me kit from my LSS. Of course, it was filled with one of my favorite manufacturers - Cosmo Cricket. Today is club day, so here are the final bits I put together. First, the layout. I totally love this layout with one small exception. That being the adhesive. BLEH!!! I am entirely out of dry adhesive. All I had left was a bottle Fiskars clear gel adhesive. I don't have anything against liquid glues. They are great for a myriad of projects. Layouts, however, are not one of them. It seriously warped like crazy as it dried. I ended up tucking it under a couple of heavy books and that helped some. It will eventually go flat once it's in the album, but for now, it's all wavy. Most annoying! Aside from that, however, I adore it. It's all about my favorite girl. These are pictures from 4th of July weekend. She was sitting and coloring at one end of the table while I scrapped on the other.

beautiful girl

One of the things that was included in the kit was a set of die cuts. I used a few on the She Adores Him page, but I pretty much had the whole sheet left. I was blog hopping a couple of weeks ago and came across a blog that showed a cute little book done with left over chipboard frames. Inspiration struck. I've been wanting to do an acrylic book and I knew this would be perfect. I stopped by the LSS for a sheet of Clear Scraps clear acrylic and went to town with it on the Accu-Cut with the Tags die. I ended up with a great handful of clear tags ready to go.

The book was not without it's struggles, however. First off, the die cuts were only printed on one side. Very typical for die cuts, not terribly great for acrylic books. Secondly, my beloved KI Gloo failed me. I've never had a problem with KI Gloo and acrylics until this project. I could not get it to dry. It showed through the acrylic, oozed everywhere and was generally a mess. I was frustrated and ready to call the project a loss, even before I took the sneak peak pictures. I decided that a few embellishments and maybe some paint sponged on in key areas would do the trick. I took photos and zipped a mail off to a girl on one of the message boards (never got a reply from her though). I knew I would need a couple of tags to replace two that were just completely beyond repair, so I stopped by the LSS and picked up another sheet of Clear Scraps (her last one!) and cut a few replacement tags, plus some scalloped circles for a future project. While I was there, Shanel turned me on to Beacon 3-in-1 Advanced Craft Glue and loaned me a bottle to try. (I just realized I left this at home even though I swore to return it to her today!) Fabulous stuff! Stinks like crazy but it holds! And even better, it DRIES! Here's a close up of one tag, showing how you can see through to the others -

close tag

Even with the new glue, I still had the problem of lots of white showing through the tags. However, since KI Gloo failed me, I was able to salvage 80% of what I'd done. I gently pried the die cuts and photos off the tags, backed them with patterned paper from the kit and then glued them back on. Some were well enough covered that an application of some BasicGrey swirl heart rubons did the trick. Others just needed a little embellishing with buttons and those green flowers that were originally on the She Adores Him layout. A few tags were unsalvageable and I pulled out the spare wallet photos and redid those. Thank goodness you get two wallet photos! I usually stash the spares away for later projects, but this time I needed them. A Creative Cafe binder ring and white and that same ribbon from the Socks layout, plus a bit of black and white ribbon from my stash completed the project. I LOVE it!! Here's the finished tags -

tagstags
tagstags
tagstags
tagstags
tagstags

Stroll down memory lane

After spending hours upon hours upon hours working on your pages, how often do you take the time to wander back through them? For me, not as often as I should. Last night I got a wonderful trip down memory lane as I browsed through my layouts looking for my favorites to submit to my LSS for their design team call. When it was all done, I settled for a nice mix of things I had just finished and things I had tucked away into albums. There were so many layouts I loved that I didn't even crack the 8x8 books.

In honor of my walk, I decided to share a few of my favorites. Starting with the 8x8s. I totally love working in this size. I can easy get 3 photos with a great layout. My top four from my daughter's book -

This is one of the first layouts I shared online. I did it for a challenge. As I recall it required a bunch of different patterned papers, ribbon and a certain number of buttons. It was so much fun to put together!

happygirl
This one is from a kit swap. Each member would build a kit for their buddy and then swap. I love Sassafrass Lass papers, so this was right up my alley.

girlonthego
Here's one from an online class. The right size was the class, with the painting and angles, everything else is all me.

lovetogoout
This last one was for a Fancy Pants Design Team call. The white is actually a transparency. I doodled on it with a resist medium and then let it dry. Once it was dry, I sponged pearl white paint onto the transparency. After it was all dry, I peeled away the resist to reveal my doodling. The transparency is then layered over cute Fancy Pants paper. I added a bit of Heidi bling and a glitter title to tell the story of my daughter getting her first bling. (Her daddy cried more than she did!)

Sparkle
Now for a few 12x12s. This one is one of my very favorites. I taught this in an online class on Create My Keepsake about a year ago. I love using bright bold colors with black & white papers and pair that up with black & white photos, with just the occasional color photo for added pizazz.

missygirl
Another total favorite here. With both kiddos, we've done a picture of them curled up in Daddy's fire helmet. I held onto these for a long time before I found just the right papers and embellishments to really make them pop. The great title doesn't hurt either. She is truly her daddy's heart!

herosheart
Fun techniques page. This one is loaded. The snowflakes are all stamped on a transparency. My favorite bit are the jumbo Making Memories grommets. This layout was actually on their gallery for a while. I love my grommet tool, even though I haven't used it in a while. Perhaps it's time to break it out again.

Snowday
A friend of mine pointed out that I had a ton of pink in my gallery. I hadn't really noticed, but I do have a girl. Here's a couple from my pink obsession -

princess

snow bunny layout
And a couple of single pagers. This first one was for a Design Team challenge. The challenge was to scrap your weakness. Tea is probably more of an obsession than a weakness for me, but I love how this layout turned out. The "{tea}" bit in the title is done on Shrink Plastic. It looks really cool in person. It's also blinged up with some Prima swirls for steam over my favorite tea mug.

insanitea
This one is actually a 2 pager, but for the longest time, only this side of the layout was complete. I would drag out the other side and stare at it a bit on a regular basis. In fact, it's only been finished for probably two months. I realized this morning what has been continuing to bug me...no journaling! What was I thinking. I plan on picking up a journaling card at the LSS and fixing that before I hand over the portfolio. I didn't think to take pictures of the other page, so you'll have to wait until it get it back to see the whole thing.

igo
Cards and Altered bits. Next to doing a layout, I love to stamp. After stamping, my greatest love is altering stuff. A good 95% of my altered stuff goes to family and friends as gifts. Here's a note, mostly to self, take time to take pictures before handing over the project! I'll post next week on the hazards of forgetting and having others photograph your work. Anyway...here's a few cards -

smilecard

u and me card

thanks card
An adorable notebook. This is done in American Crafts. I just love this! I actually made 2 of these. The first one doesn't look near this pretty and only has a handful of pages still in it. I used the heck out of it. I need to make another before I start using this one. That way I'll always have one ready to go.

notebook
Totally fun Milk Carton. Shanel (my LSS owner) had these in stock and I fell in love with them. This is the only one I got pictures of, however. As far as I know, it is still living at her shop.

Photobucket
Combo card & altered. Pubcalls was doing a big birthday bash and giving away fun prizes. I didn't win anything, but I loved how this card and altered clothes pin turned out. I made a matching envelope for the card that is lined in the same patterned paper. I still have this. It's just too cute to give away!

Photobucket

Aug 13, 2008

Let's Talk Layouts!

Let's talk layouts. After being only partly productive last week, I more than made up for it this week. Miss is getting used to Mama scrapping regularly on the weekends and comes to sit at one end of the table with her crayons. When she tires of that, I can generally distract her with the Backyardigans or a selection of Disney movies. The boy child tend to be more problematic, but he's 4 months old, so I give him a bit more slack. Either way, productivity was high. I got the two from last week done, plus some. So let's talk!

First up, my total favorite. I loved it from last week, but now that it's finished, I love it even more. It doesn't hurt that it features my guy!

this man

I did go with glittering for the title. Unlike the letters in the glitter tutorial, though, this one was a bit more challenging. The welded title was too big to fit through my mini Xyron. Now I do have a Xyron 900, which would have worked, except it's out of adhesive. I've been thinking about investing in a 510 for larger titles like this. Thinking is as far as I've gotten with it though. I ended up using a liquid adhesive and then glittering. Some areas dried faster than I could glitter so they aren't covered. You can't really see it here, but it gives it a nice rustic distress look that really fits well with the rest of the layout. I also had brackets cut to go around the title, but decided not to use them. The black scalloped band is velvet trim from my LSS's Creative Cafe. They were featured on the Creative Cafe blog, so you can see where I shop! I'm always raiding the cafe wall when I go in. So much goodness!

this man title

The other layout from last week, finished. I have to say I totally love how it turned out. I did decide to swap the pages back to the way I originally built it. I just liked the feel of it this way.

adores


Notice anything different about the flowers? The green totally bugged me all week with the pictures up on the blog. So I decided to go with something that better fit the layout. Since I didn't have any white flowers on hand, I made some. I really love how the crocheted flowers look and they took less than 5 minutes a piece. I would whip one out whenever I had my hands free. I actually ended up with 7, so I've got extras for cards or another layout. Take a closer look -

adores flower

Moving on to new work for the weekend, I found my Uniball White pen and went nuts-o for a bit. I knew I wanted to do circles and was trying to figure out how to do the background. I used an old Creative Memories template that I got at a National Scrapbook Day crop eons ago. The double layered technique I learned in an online class. It was taught as a freehand sort of technique, but I've had the best luck when using a template. If I free hand it, I throw it away. :) My pen was pretty low when I started this and now I'm nearly out of ink entirely and need to find a replacement pen.

cartoon

For some reason, I did a close up on the fun flower, which is layered die cuts that were included in the kit, but no close up on the doodling. Go figure! Maybe I'll take a few minutes and write up a tutorial on this and the crocheted flowers. Still, I liked how the die cut turned out -

cartoon flower

After all that pop and pizazz, I went for something more...I dunno. Chic maybe. The style on this last layout is definitely a 180 from the others! It's more soft, more subdued in color. I used the oh so yummy Black Market Society papers from the kit and added in some matching flower ribbon I found at Hobby Lobby and some Imaginisce velvety bling flowers I'd gotten from the LSS for a different project and then ended up not using them. They've been sitting around waiting for just the right layout. They were actually on the table with me because I had thought to use them on the Adores layout, but went with the crocheted look there instead. The black brads I used were out on the table because I thought they'd work with the crocheted flowers, but turned out to be too small for that.

sock

I've got two altered projects in the work at the moment. A mini book of acrylic tags. I totally freaked on it as the glue didn't want to seem to dry. I guess I was just being impatient because when I went back to fiddle with them last night they were seriously stuck fast. It took 48 hours to get there though!I still need to do a bit of tweaking on them to make up for the glue showing through in some areas, but I really like the way they're turning out. Sneak peek -

tags 5

I think I'm going to do a bit of stamping with some staz-on and maybe a bit of sponging with some paint, but that's for this weekend. My other project is an altered canvas with a photo transfer technique. My friend Becks found the instructions on the Scrap Freak site and I couldn't resist giving it a go. I've always wanted to do an altered canvas and I had picked up some sweet Bo Bunny papers at the LSS a couple of weeks ago that are just perfect for this. The canvas got the base coat last night and I'm hoping the kiddos cooperate for me to get the photo transfer done tonight. My guy is working, so all bets are off at this point.

Aug 8, 2008

A Bit of Bling - Glitter Style

Glitter is one of those things that doesn't photograph well, yet still gives a nice punch of impact to your layouts. I love using it. Occasionally I have people asking me how I got the nice even glitter coverage on my letters. Since I was glittering anyway, I figured I'd take a few photos and share the how to that works best for me. Click on images for a larger version.

First off, supplies. Mine are pretty simple and straight forward. I use my Xyron 150 loaded with permanent adhesive, a good quality extra fine glitter (it really does make a difference), in this case Doodlebug, and my letters. The letters are the Cuttin' Up Cricut font cut at 1 3/4". Any guesses as where this title is going? :D It took me a while, but I finally came up with something that really fit those pictures. The letters are loose, but I cut a white welded shadow for them to go on to give them just an extra bit of unity and pop.

Photobucket

You can use any color cardstock for glittering letters, but I've found I get the best results when I use cardstock that is the same color or very close in color to my glitter. Since I'm using black glitter, I went with black cardstock. Run the letters FACE DOWN through the Xyron. It's much easier to glitter the face first and then apply adhesive to the back. I've actually done it both ways when I decided at the last minute to use a bit of glitter. You can do it, it's just far easier to glitter first.

Photobucket

Give the letters a good rub. If you've ever used a 150 machine, you know that no matter how much you rub the cover, you still end up with adhesive boogers. There's all sorts of pricey tools you can use to eliminate these. Most rubon tools and scoring tools are effective. I find, however, that a slightly dull pencil does better than anything else I own. Take your time and carefully go around each edge of every letter. There's no rush. You don't get a prize for glittering first, and really, it's important to just take your time and make sure you get every edge.

Photobucket

Peel away the cover layer. If you see any areas where you still have adhesive (they'll be shiny and sticky if you touch them), use a bit of plastic wrap over the area, press and cut in those edges again. Once you've got all the extra adhesive boogers gone, flip your paper over and give the backer paper a good rub down. This will ensure a nice even coverage of the adhesive on the letter. This is particularly important if you're using textured cardstock. The Xyron adhesive likes to just sit on the high points, or peel away with the backer paper. Carefully peel off the letters and lay them onto your glitter surface. If you have any letters with missing areas of adhesive, very carefully run the letter back through the Xyron. If you're careful, it won't stick to the machine. Repeat the previous step to eliminate extra adhesive and then peel away the letter.

Photobucket

You're ready to glitter! While a little glitter goes a long way, now is not the time to be stingy. Dump a good portion of glitter over each letter. It will look like a mess and if you're not careful, you'll have glitter everywhere. I have one of those tidy trays, but I've found that a piece of paper, or a paper plate works just as well. When I'm doing lots of letters, the paper plate tends to work better. Keep in mind that the glitter will stick to the paper plate. If you're worried about that, take a minute to rub the plate down with a bit of corn starch and then wipe lightly with a paper towl. This help the glitter come off the plate. I usually don't bother as the amount that sticks is pretty minimal.

Photobucket

If you're a bit of a neat freak, this next step could drive you nuts. I shake the plate a bit to make sure the letters are well covered and then I just fish for them with my fingers. If you don't want glittered fingers, use a pair of tweezers. Hold the letters by the edges, making sure you're over the plate (or tidy tray, or whatever glitter surface you chose) and gently tap them on the back side. This will cause any loose glitter to flick off and back onto the pile. Set each letter off to one side. You may have more glitter jump off when you place the letter down. Just make sure you place them on a covered surface.

Photobucket

As I mentioned, glitter doesn't photograph well. So this shot looks pretty much like the first one. This next shot isn't much better, but you can get a bit of a feel for how the end results looked.

Photobucket

This is my glitter pile after I fished out all the letters. For cleanup, I simply bent the plate and poured the glitter back into the bottle. Once all the loose stuff was off, I took a paint brush and brushed anything else that would come off the plate into the jar. There was still a slight film, but as the jar was still full, I didn't bother with it and just chunked the plate into the recycle bin.

Photobucket

When I'm ready to stick the title down, I'll run the letters through the Xyron 150 one more time, this time face up. While the letters are still covered, a good rub down on the surface makes sure the glitter is well stuck. You'll still get a bit that will want to migrate to any possible surface. If this bothers you, once you remove the cover layer on the 150 paper, go over each letter with some Crystal Lacquer or other clear dimensional paint.