First up, my total favorite. I loved it from last week, but now that it's finished, I love it even more. It doesn't hurt that it features my guy!
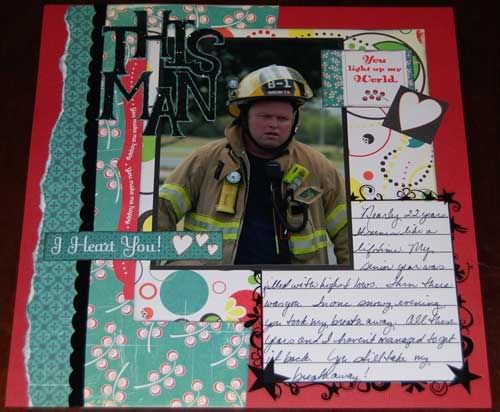
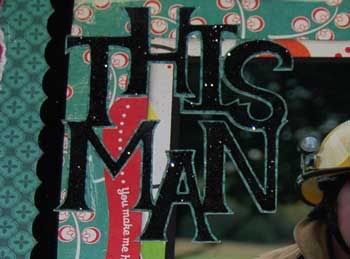
I did go with glittering for the title. Unlike the letters in the glitter tutorial, though, this one was a bit more challenging. The welded title was too big to fit through my mini Xyron. Now I do have a Xyron 900, which would have worked, except it's out of adhesive. I've been thinking about investing in a 510 for larger titles like this. Thinking is as far as I've gotten with it though. I ended up using a liquid adhesive and then glittering. Some areas dried faster than I could glitter so they aren't covered. You can't really see it here, but it gives it a nice rustic distress look that really fits well with the rest of the layout. I also had brackets cut to go around the title, but decided not to use them. The black scalloped band is velvet trim from my LSS's Creative Cafe. They were featured on the Creative Cafe blog, so you can see where I shop! I'm always raiding the cafe wall when I go in. So much goodness!
The other layout from last week, finished. I have to say I totally love how it turned out. I did decide to swap the pages back to the way I originally built it. I just liked the feel of it this way.

Notice anything different about the flowers? The green totally bugged me all week with the pictures up on the blog. So I decided to go with something that better fit the layout. Since I didn't have any white flowers on hand, I made some. I really love how the crocheted flowers look and they took less than 5 minutes a piece. I would whip one out whenever I had my hands free. I actually ended up with 7, so I've got extras for cards or another layout. Take a closer look -

Moving on to new work for the weekend, I found my Uniball White pen and went nuts-o for a bit. I knew I wanted to do circles and was trying to figure out how to do the background. I used an old Creative Memories template that I got at a National Scrapbook Day crop eons ago. The double layered technique I learned in an online class. It was taught as a freehand sort of technique, but I've had the best luck when using a template. If I free hand it, I throw it away. :) My pen was pretty low when I started this and now I'm nearly out of ink entirely and need to find a replacement pen.

For some reason, I did a close up on the fun flower, which is layered die cuts that were included in the kit, but no close up on the doodling. Go figure! Maybe I'll take a few minutes and write up a tutorial on this and the crocheted flowers. Still, I liked how the die cut turned out -

After all that pop and pizazz, I went for something more...I dunno. Chic maybe. The style on this last layout is definitely a 180 from the others! It's more soft, more subdued in color. I used the oh so yummy Black Market Society papers from the kit and added in some matching flower ribbon I found at Hobby Lobby and some Imaginisce velvety bling flowers I'd gotten from the LSS for a different project and then ended up not using them. They've been sitting around waiting for just the right layout. They were actually on the table with me because I had thought to use them on the Adores layout, but went with the crocheted look there instead. The black brads I used were out on the table because I thought they'd work with the crocheted flowers, but turned out to be too small for that.

I've got two altered projects in the work at the moment. A mini book of acrylic tags. I totally freaked on it as the glue didn't want to seem to dry. I guess I was just being impatient because when I went back to fiddle with them last night they were seriously stuck fast. It took 48 hours to get there though!I still need to do a bit of tweaking on them to make up for the glue showing through in some areas, but I really like the way they're turning out. Sneak peek -

I think I'm going to do a bit of stamping with some staz-on and maybe a bit of sponging with some paint, but that's for this weekend. My other project is an altered canvas with a photo transfer technique. My friend Becks found the instructions on the Scrap Freak site and I couldn't resist giving it a go. I've always wanted to do an altered canvas and I had picked up some sweet Bo Bunny papers at the LSS a couple of weeks ago that are just perfect for this. The canvas got the base coat last night and I'm hoping the kiddos cooperate for me to get the photo transfer done tonight. My guy is working, so all bets are off at this point.
1 comment:
I enjoyedd reading your post
Post a Comment